Ever seen a group of highway cruisers ridingoff-road motorcycles (also known as dirt bikes) making their way modestly on the roads … Definitely head turners!! Here they are and even before you could note it, they suddenlyvanish away in lightning speed bypassing the roads.And once they hit the dirt of the unconventional paved path they become the dirt bikes as the name suggests.Specially designed for off-road events, the Dirt bike graphics install are exclusively designed for a variety of off-road motorcycle sports.
Dirt Bike Graphics / Dirt bike art
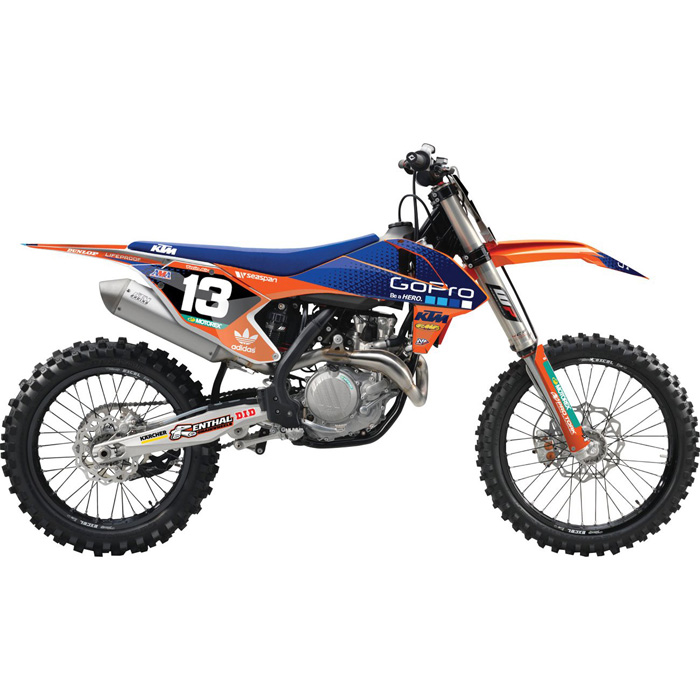
The impact these dirt bikes leaveon the onlookersmind other than the rugged look, the higher ground clearance, knobby tires and no fairings are the neatly pasted brightly coloredmotorcycle graphicand decals(also known as bike art)some of which are reflective and the colors aptly chosen to increase the visibility of the bikes.
Why Dirt bike graphics?
While choosing bike graphics, rider can opt to personalize the graphic or even create his own designs and is basically of the three types:
- semi- customized graphics
- pre-made or
- Fully customized graphics.
Graphic Kits
An array of Graphics kits is available:
- Full kit of the Dirt bike graphics install includes decals for front and rear fenders, lower forks, swingarm and radiator shrouds.
- Radiator shroud kitcontains decals for radiator shrouds only.
- Trimkit consists of front and rear fender decals, swingarm, fork tube and air box decals.
- A pre-printed background comprises the pre-printed number plates along with the name.
- Universal background provides sheets to apply or cover any area of the motorcycle.
Installation
There are few things that should be kept in mind for the successful installation of dirt bike graphics. It has been noticed that it can be difficult to stick the graphics to brand new plastic as the wax like manufacturing oil residue on new plastic material could act as an hindrance. The plastic needs to be thoroughly scrubbed and cleaned before the final installing on the plastic surface. The other problems faced during the process could be misalignment and bubbling. Bubbling or wrinkles tend to appear in some graphics. In such cases, the graphics needs to be peeled off completely to remove the bubble and then stuck back again to the surface.
For used plastic, the removal of old decals is extremely important. The heat gun is used here to warm the old graphics and helps in peeling off much easier. Contact cleaners or alcohol can be rubbed to clean off residual sticker and is allowed to dry before the new graphics are installed.
Aligning the graphics piece to the plastic is a little tricky and once placed the corners of the graphics backing paper is carefully pulled back. The thumb or a plastic edging tool can be used to remove any bubbles and it is advisable to go slowly for an successful attempt. In case any bubbles are noticed, the decal can be peeled off the plastic and reapplied. This completes the installation process on dirt bike graphics on motorbikes.


